
VI. AI Layout Features
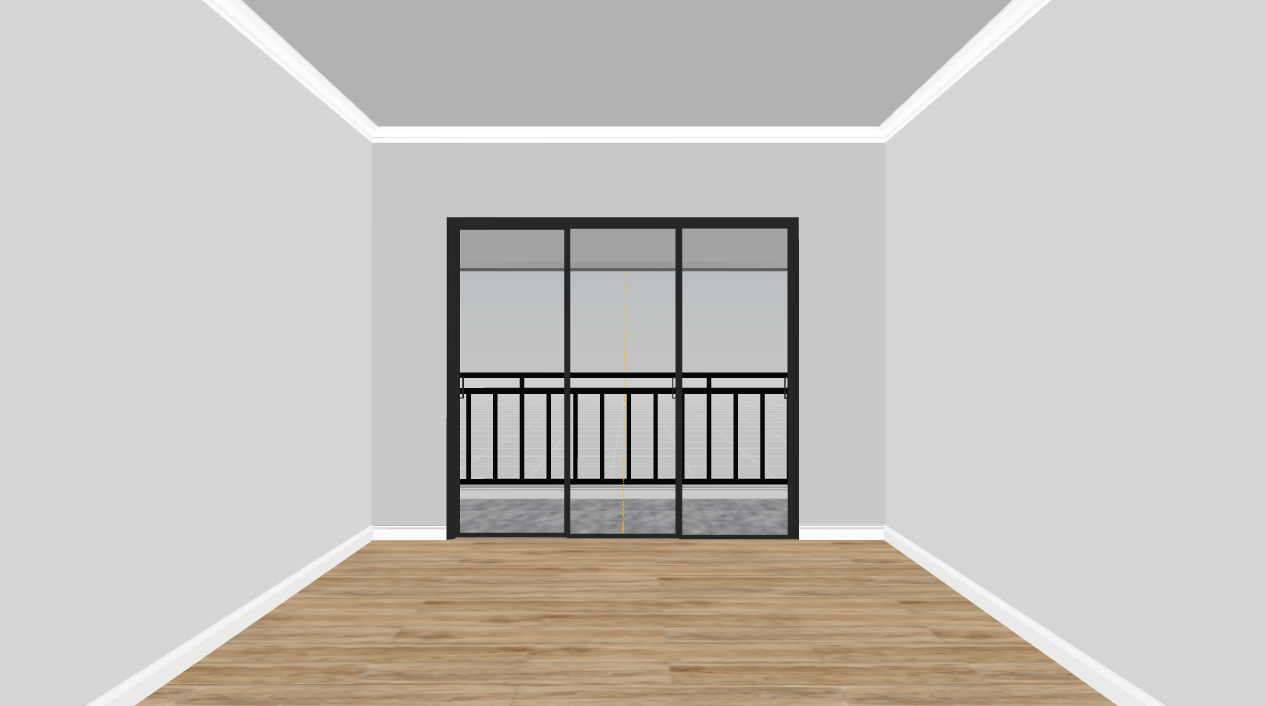
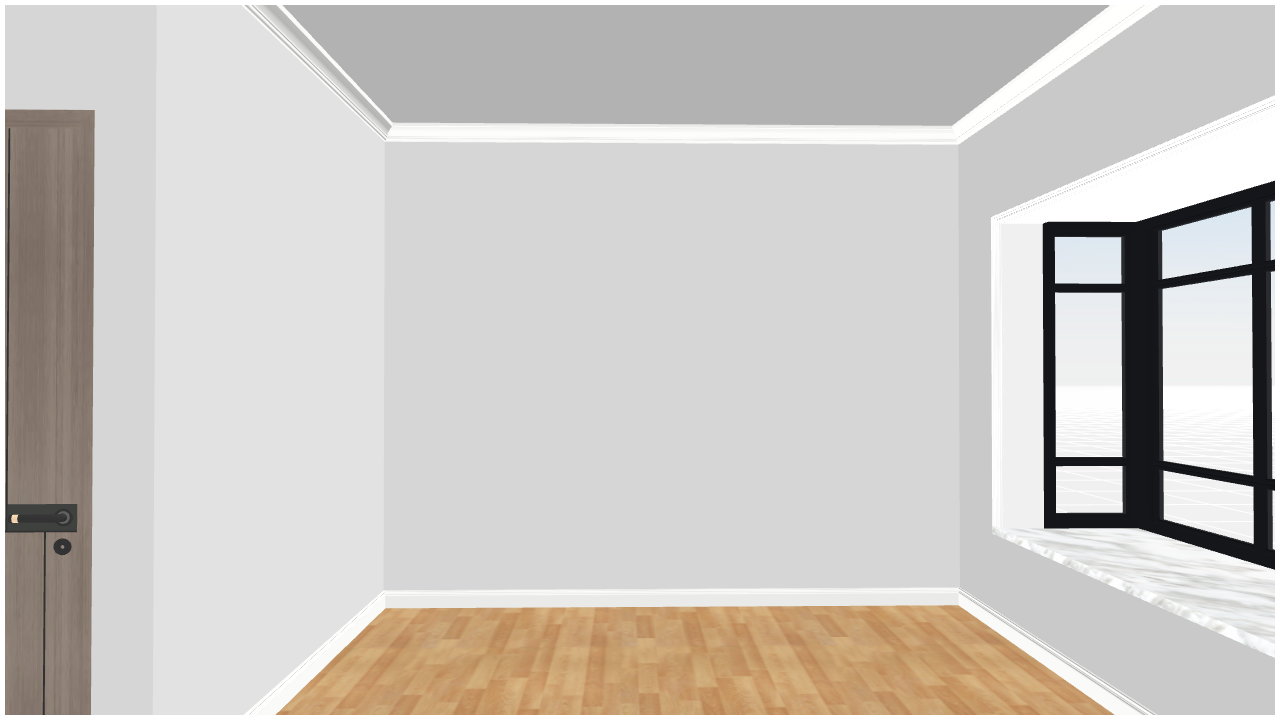
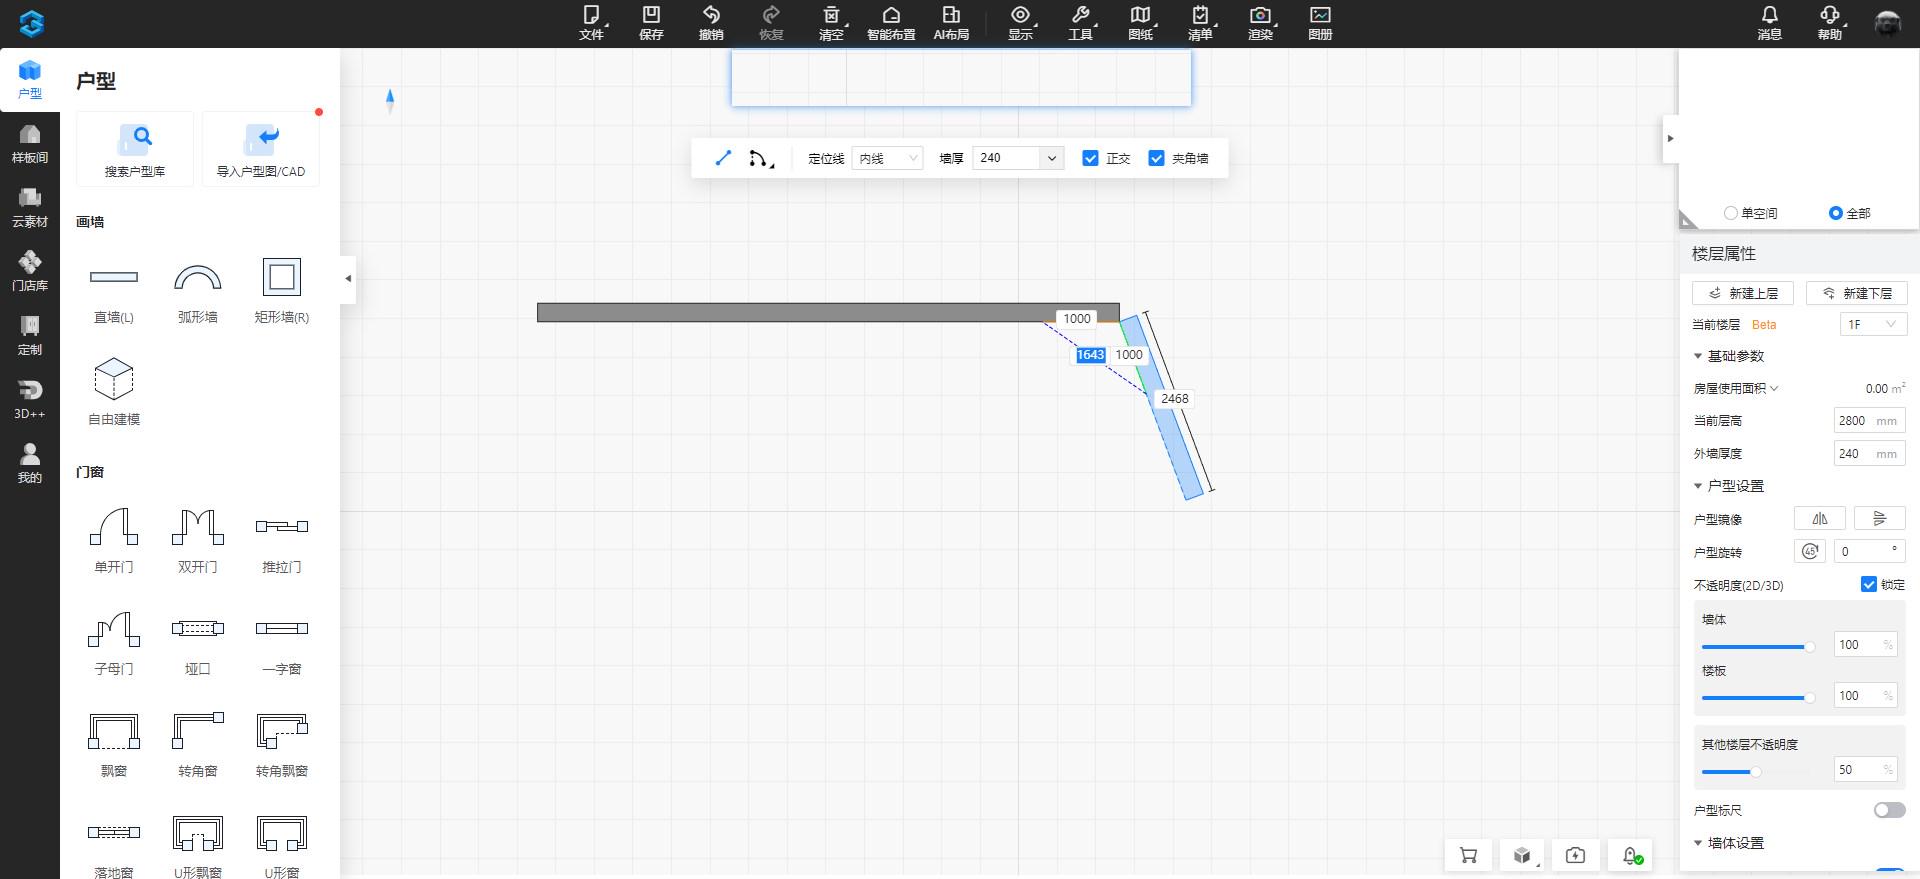
1. AI-Powered Floor Plan Design
Problem Solved:
Previously, users could not modify walls and structural elements in the layout.
Now, users can adjust wall positions and dimensions to meet their personalized needs.
This enhancement provides greater creative freedom, allowing users to optimize and redesign spaces based on practical requirements and aesthetic preferences.
Steps:
-
Open AI Layout and enter the floor plan design interface.
-
Click the "Straight Wall" tool to draw walls in the floor plan.
-
Drag doors, windows, and other structural components into the layout to complete the design.
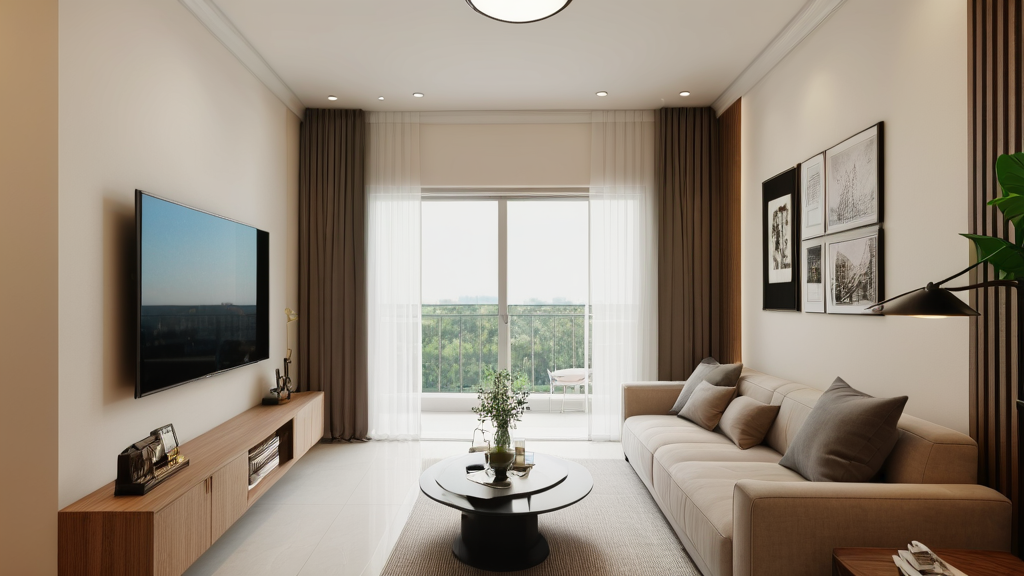
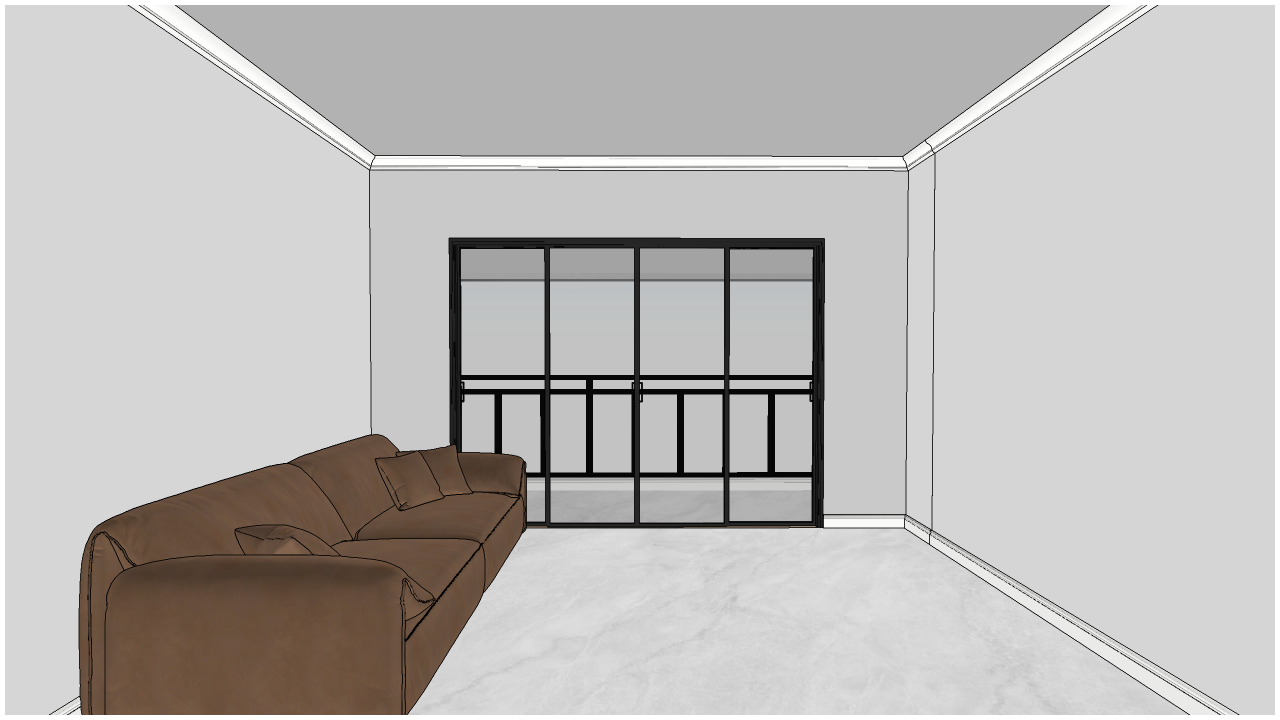
2. Instant 3D Preview in AI Layout
Feature Overview:
Previously, users had to generate a full 3D model before previewing their design in 3D.
Now, 3D effects can be previewed instantly within AI Layout without full rendering.
Steps:
-
Open AI Layout, create a layout, and choose a furniture set.
-
Click Tools > 3D Quick Preview.
-
The feature allows switching to white model mode and provides three different viewing angles.
-
Users can also switch between solid color, daytime, and nighttime lighting modes.
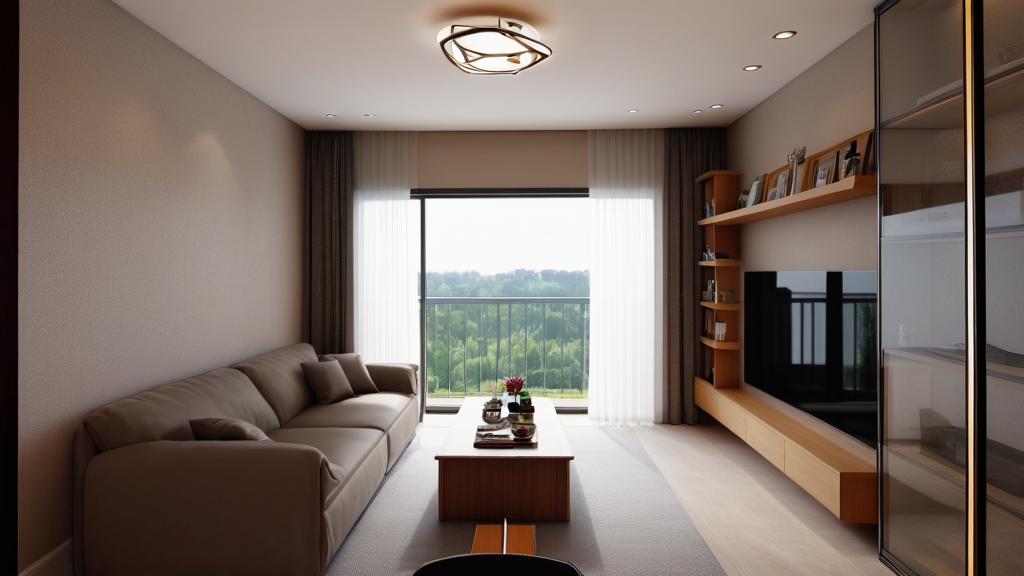
-
Click AI Rendering to quickly generate a render, then click Show Album to view AI-rendered images on the right panel.
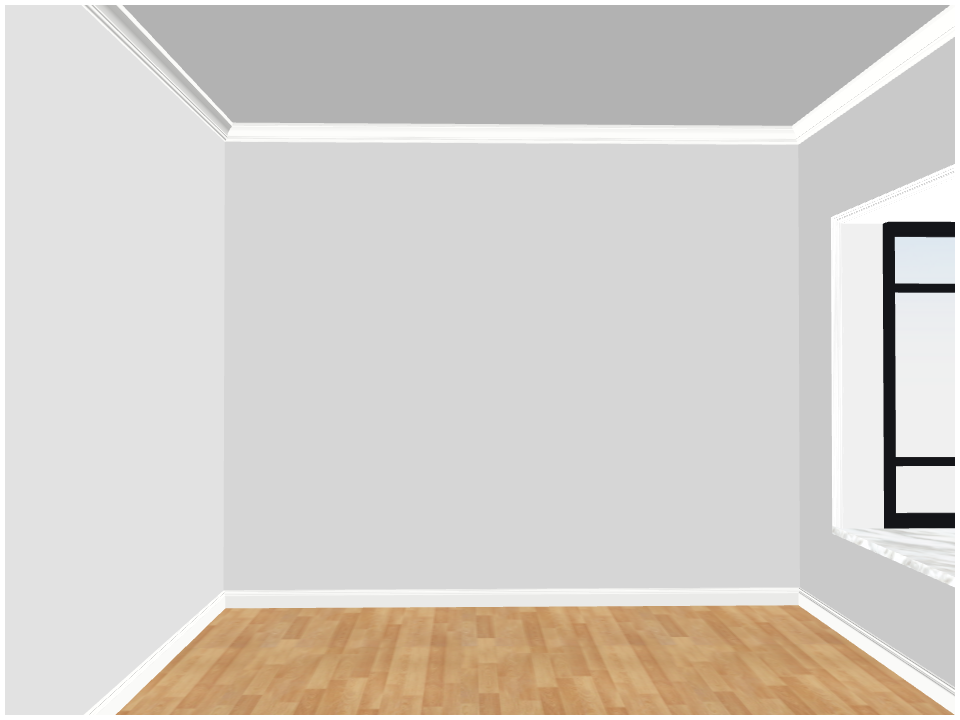
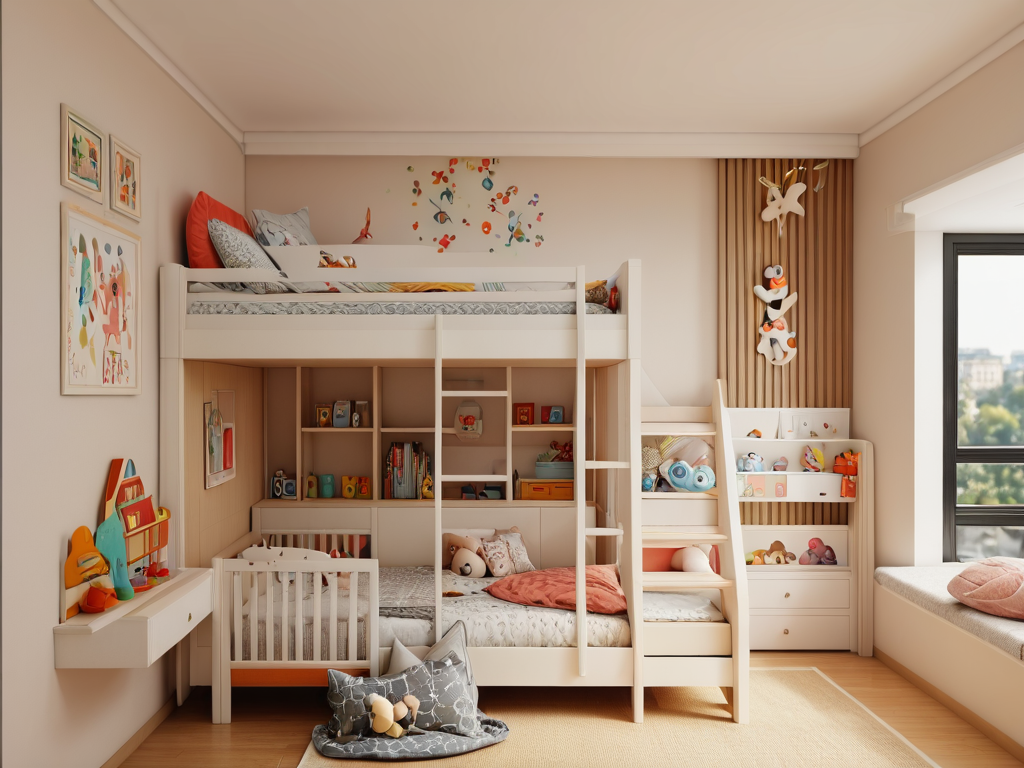
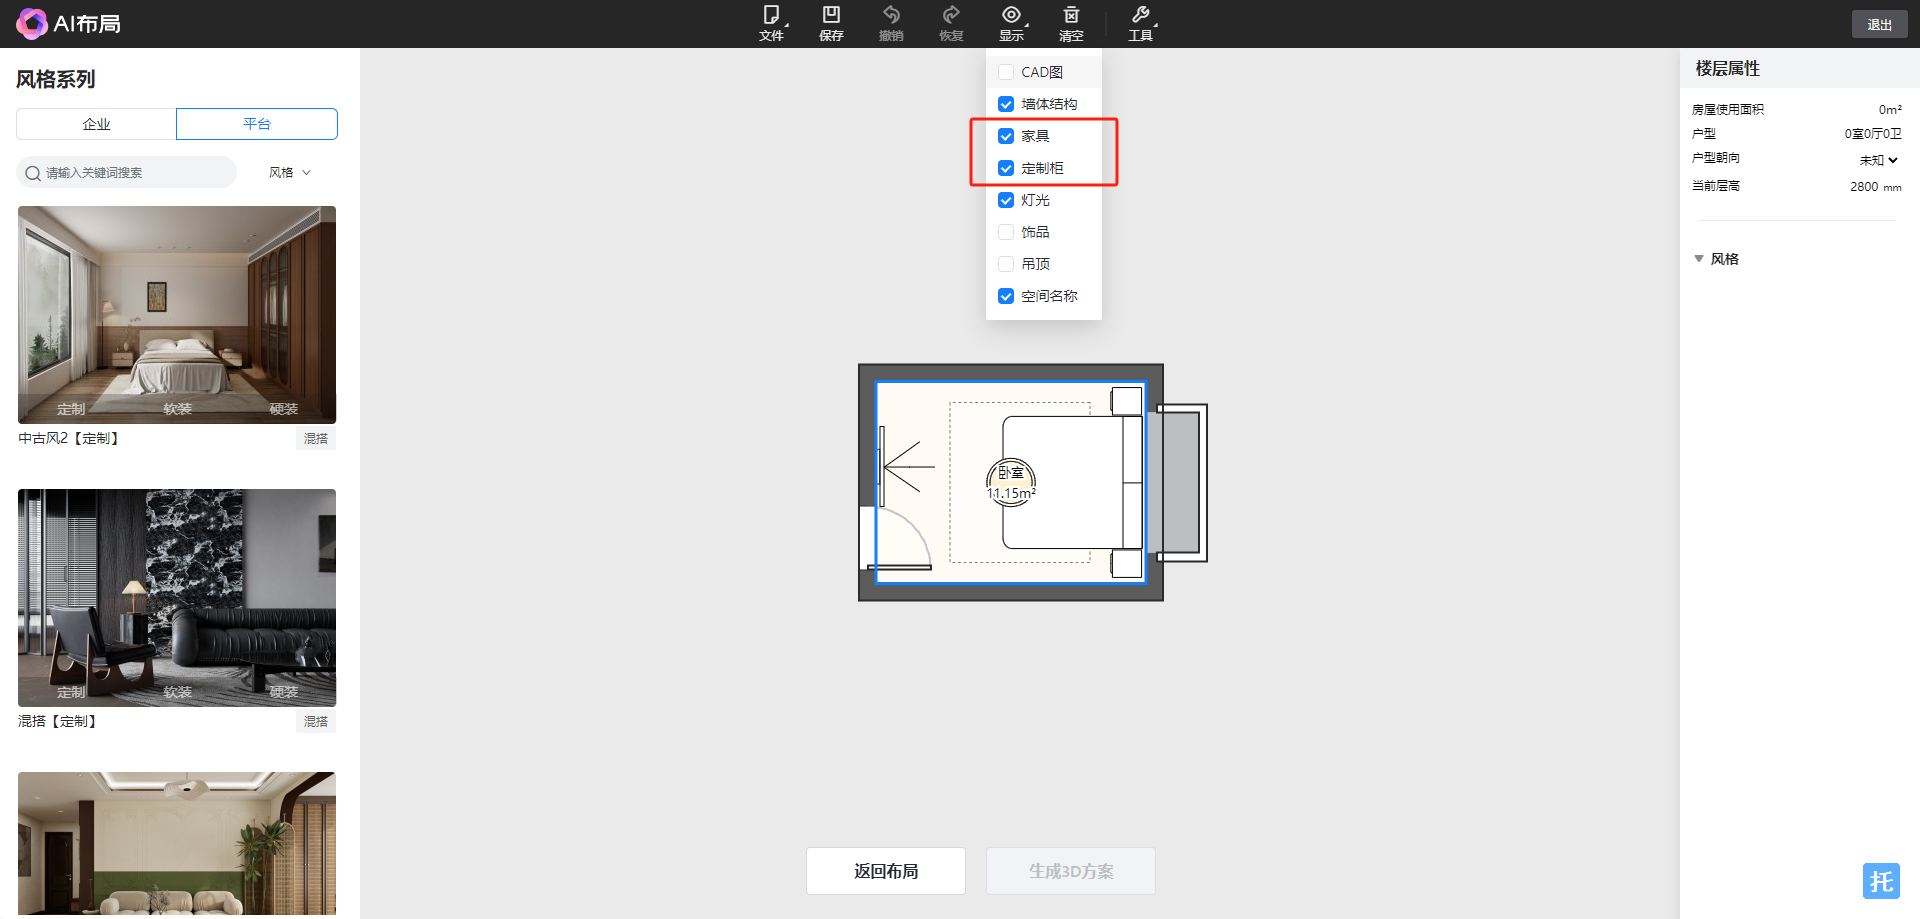
3. New Furniture & Custom Cabinet Layers
Problem Solved:
-
Previously, users could not separately display or hide furniture and custom cabinet layers in the visibility settings.
-
Now, users can independently control the display of these layers for better organization and visualization.
Steps:
-
Open AI Layout and create a floor plan.
-
Click Display Settings and check/uncheck the desired layers to control visibility.
VII. Customization Module Feature Updates
1.[Customization] Wardrobe - Added Inward and Outward Opening for Unit Doors
Previously, unit doors in the wardrobe module could only be dragged and placed in the default orientation without the ability to flip between inward and outward opening. If a user needed the door to open inward into another space, they had to manually drag and place it again in that space. With this update, designers can now configure the inward or outward opening of unit doors in the inventory settings. This allows for direct drag-and-drop placement and the ability to switch the door's opening direction in the product layout panel, significantly improving design efficiency.
Steps:
- Open a custom design project and enter the wardrobe module.
- Drag and drop a unit door into the floor plan; it defaults to an outward-right opening.
- Switching the door's opening direction flips it 180 degrees.
- Drag and drop an inward-opening hidden door into the floor plan; it defaults to inward opening and automatically rotates 180 degrees based on inventory settings.
- When dragging a unit door, the layout panel displays its default assigned room, which can be modified to relate to a different room on the same wall. If dragged to an unlinked wall in another room, the assigned room updates automatically.
2. [Customization] Material Brush with Substrate Application
Issue Resolved:
Previously, when applying materials using the material brush, only the texture was applied without the substrate. This update ensures that both the texture and substrate are applied when assigning materials across modules, improving accuracy.
Steps:
- Open a custom design project and click on the top menu under "Tools" > "Material Brush."
- Select a cabinet material with its associated substrate and apply it to a wall.
- Extract a wall material (including substrate) and apply it to another cabinet, ensuring the cabinet material also carries the substrate.
- If the material is associated with multiple substrates, a selection window will pop up for the user to choose.
3. [Customization] Retail User Inspection - Door Panels & Cabinets
Issue Resolved:
Retail users can now quickly inspect door panels and cabinet details, including the display of cabinet substrate colors.
Steps:
- Open a custom design project and enter the wardrobe module.
- Click on the top menu under "Inspection" > "Door Panels/Cabinets."
- Instantly view detailed information about door panels and cabinets.
4. [Customization] Wardrobe/System Cabinet - Support Foot Installation
Issue Resolved:
With the integration of home customization (wardrobes, system cabinets) and kitchen & bath customization (kitchen cabinets, bathroom cabinets, balcony cabinets), support foot installation has been added. This enables the design of cabinets, such as bathroom cabinets, with support legs, enhancing functionality and improving design efficiency.
Steps:
- Open a 3D project and enter the wardrobe module.
- Drag and place a wardrobe.
- Right-click the cabinet or use the top menu "Install" > "Support Foot."
- In the support foot installation panel, select the foot style and adjust position, mirroring, etc.
- Click "Install" to generate support feet.
5. [Customization] Lighting: Side Light Installation
Previously, side lighting could not be added to wardrobes or wall panels, limiting design flexibility and rendering options. This update allows side lighting installation, including slotting for production needs.
- Open a custom design project and enter the wardrobe module.
- Right-click the cabinet or go to "Install Lighting" in the top menu, then select "Side Light."
- Hover over the side of a panel, set the installation position and edge distance, then click "Install" to generate the side light.
- Note: This feature must be enabled in the backend settings for material-side lighting installation.
6. [Customization] Lighting: Rotation
Shelf lights were previously installed based on the default shelving orientation. However, some companies pre-rotate shelving before importing, requiring a 90° rotation for correct lighting installation. This feature now supports rotating lighting direction for better adaptability to side cabinets, corner cabinets, and beveled cabinets.
- Open a custom design project and enter the wardrobe/kitchen cabinet module.
- Drag and drop a side cabinet or corner cabinet, then right-click or go to "Install Lighting" in the top menu.
- In the installation panel, click the rotation button next to the length setting to rotate the lighting 90°, then click "Generate."
7. [Customization] Lighting: Set Default Installation Size Based on Space
This update allows lighting installations to automatically adapt to the relevant panels in the selected space, using the space's dimensions (length, width, height) as the default lighting length for better visualization.
- Open a custom design project and enter the wardrobe/kitchen cabinet module.
- Right-click the cabinet or use the top menu "Install Lighting."
- Select the installation space, and the related panels will generate lighting based on the space's dimensions.
8. [Customization] Predefined Styles
Feature Introduction:
Users can now set default styles in the style library, allowing all subsequently added assets to automatically adopt the predefined material, pattern, and configuration.
Previously, default styles in the style library only applied to generated elements like door panels and countertops. Other assets required manual application after being added to the project. This update streamlines the process.
Steps:Personal Edition:
- Open the top menu under "Tools" > "Settings" > "Home Customization" and enable "Predefined Styles."
- Enter the customization module, click "Style" in the top menu, set the desired style as default, and drag assets into the project.
Enterprise Edition:
- The backend administrator enables predefined styles in "3D Backend" > "Resource Configuration" > "Style Library."
- Once enabled, all assets will adopt the company-defined default style, though designers can still select other styles from the frontend style library.
9. [Customization] Irregular Cabinet Adaptation: Side Panel Adapts to Corner Shelf Depth and Direction
Feature Overview:
When placing a side panel inside a corner cabinet, it will automatically adapt to the depth of the corner shelf and can switch placement directions.
Problem Solved:
Previously, when placing a side panel inside a corner cabinet, its depth would default to match the full cabinet depth, requiring manual adjustment to align with the corner shelf.
How to Use:
-
Open the custom design plan.
-
Select the cabinet, press the shortcut key G, or right-click and choose Functional Component, then insert the side panel. It will automatically adapt to the corner shelf depth.
-
Press the Spacebar while moving the side panel to switch its direction.
Note:
For multi-component corner shelves, you can define the panel contour line settings to control the adaptation depth of the side panel.
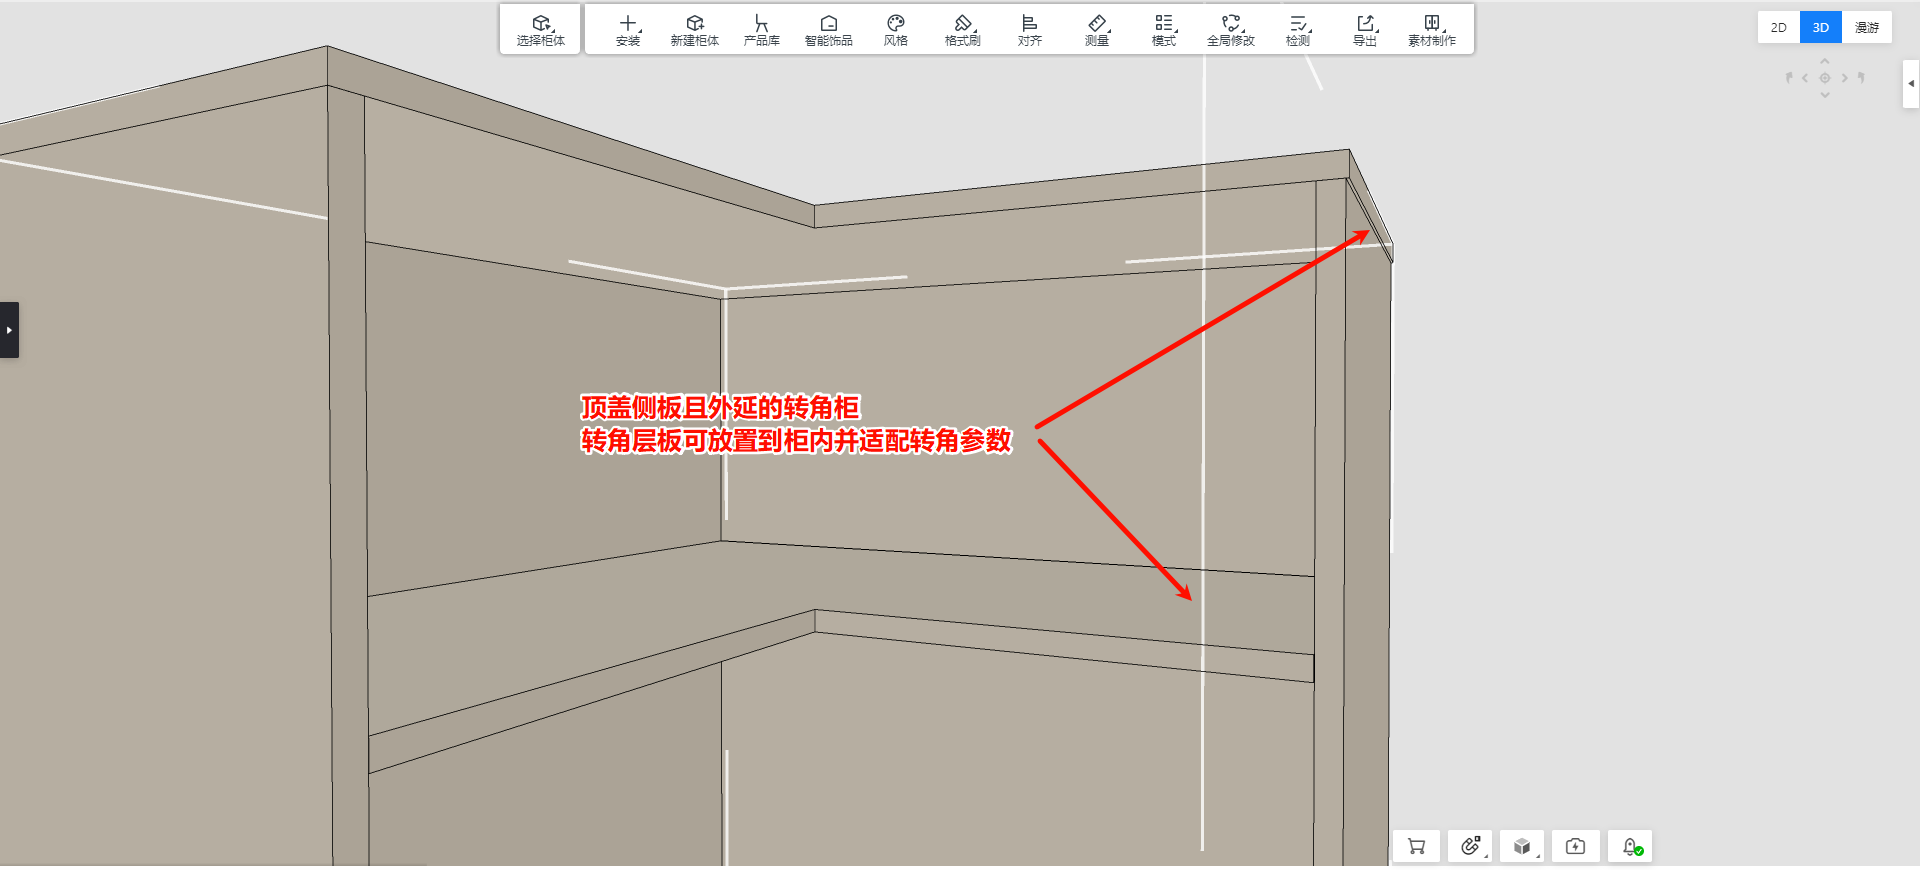
10. [Customization] Irregular Cabinet Adaptation: Corner & Cut-Angle Shelves Can Be Placed in Cabinets with Process Gaps
Feature Overview:
Corner and cut-angle shelves can now be placed inside cabinets where the back and side panels have process gaps or where the top panel overlaps the side panels. These shelves also support parameter-driven corner and cut-angle adjustments.
Note:
For cut-angle cabinets, the cut-angle panels must be set as "Cut-Angle Horizontal Panel" or "Cut-Angle Vertical Panel".
Problem Solved:
Previously, corner and cut-angle shelves could not be placed inside cabinets with process gaps or overlapping top panels.

How to Use:
-
Open a custom design plan that includes a corner or cut-angle cabinet.
-
Select the cabinet, press G, or right-click and choose Functional Component.
-
Insert a corner or cut-angle shelf inside the cabinet.
11. [Customization] Irregular Cabinet Adaptation: Multi-Component Corner & Cut-Angle Shelves Can Be Placed in Cabinets
Feature Overview:
Multi-component corner and cut-angle shelf components can now be placed inside corner cabinets by setting the panel contour lines. These components also support parameter-driven corner and cut-angle adjustments.
Problem Solved:
Previously, when adding accessories like decorative strips or LED lights (e.g., handle-free shelves or glass shelves) to corner shelf components, they could not be placed inside the cabinet.
How to Use:
-
Open a custom design plan that includes a corner cabinet.
-
Select the corner cabinet, press G, or right-click and choose Functional Component.
-
Insert a corner glass panel or any other multi-component corner shelf inside the cabinet.
12. [Customization] Special-shaped Cabinet Adaptation: Corner and Cut Panel Inspection (for enterprise user)
Feature Overview:
When creating corner and cut-angle panels or functional components in the 3D backend, a validation check will be performed during saving. It will highlight any non-standard configurations and provide solutions.
Problem Solved:
The process of adding corner and cut-angle shelves to the library involved multiple steps and was prone to errors.

How to Use:
-
Open the 3D Backend.
-
When saving a functional component with a placement rule set to "Corner Shelf Installation", the system will automatically run a validation check.
-
Manual Check: Click the top menu → Check → Corner & Cut-Angle Standard Check.
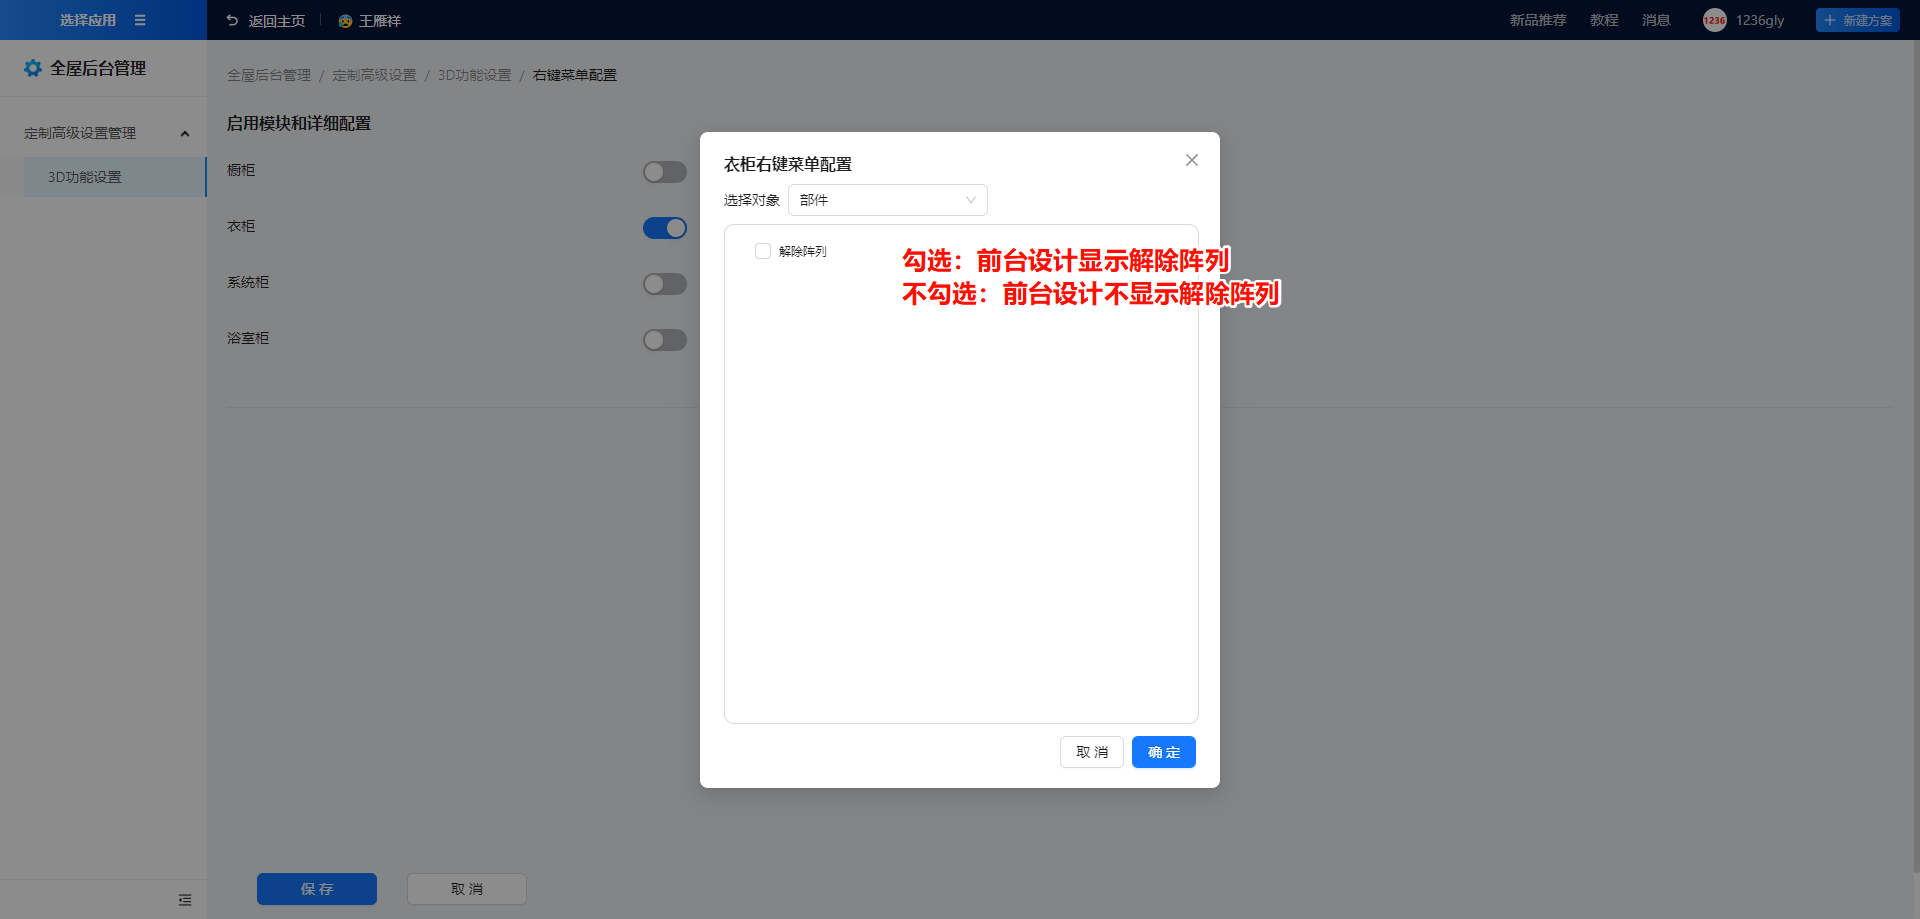
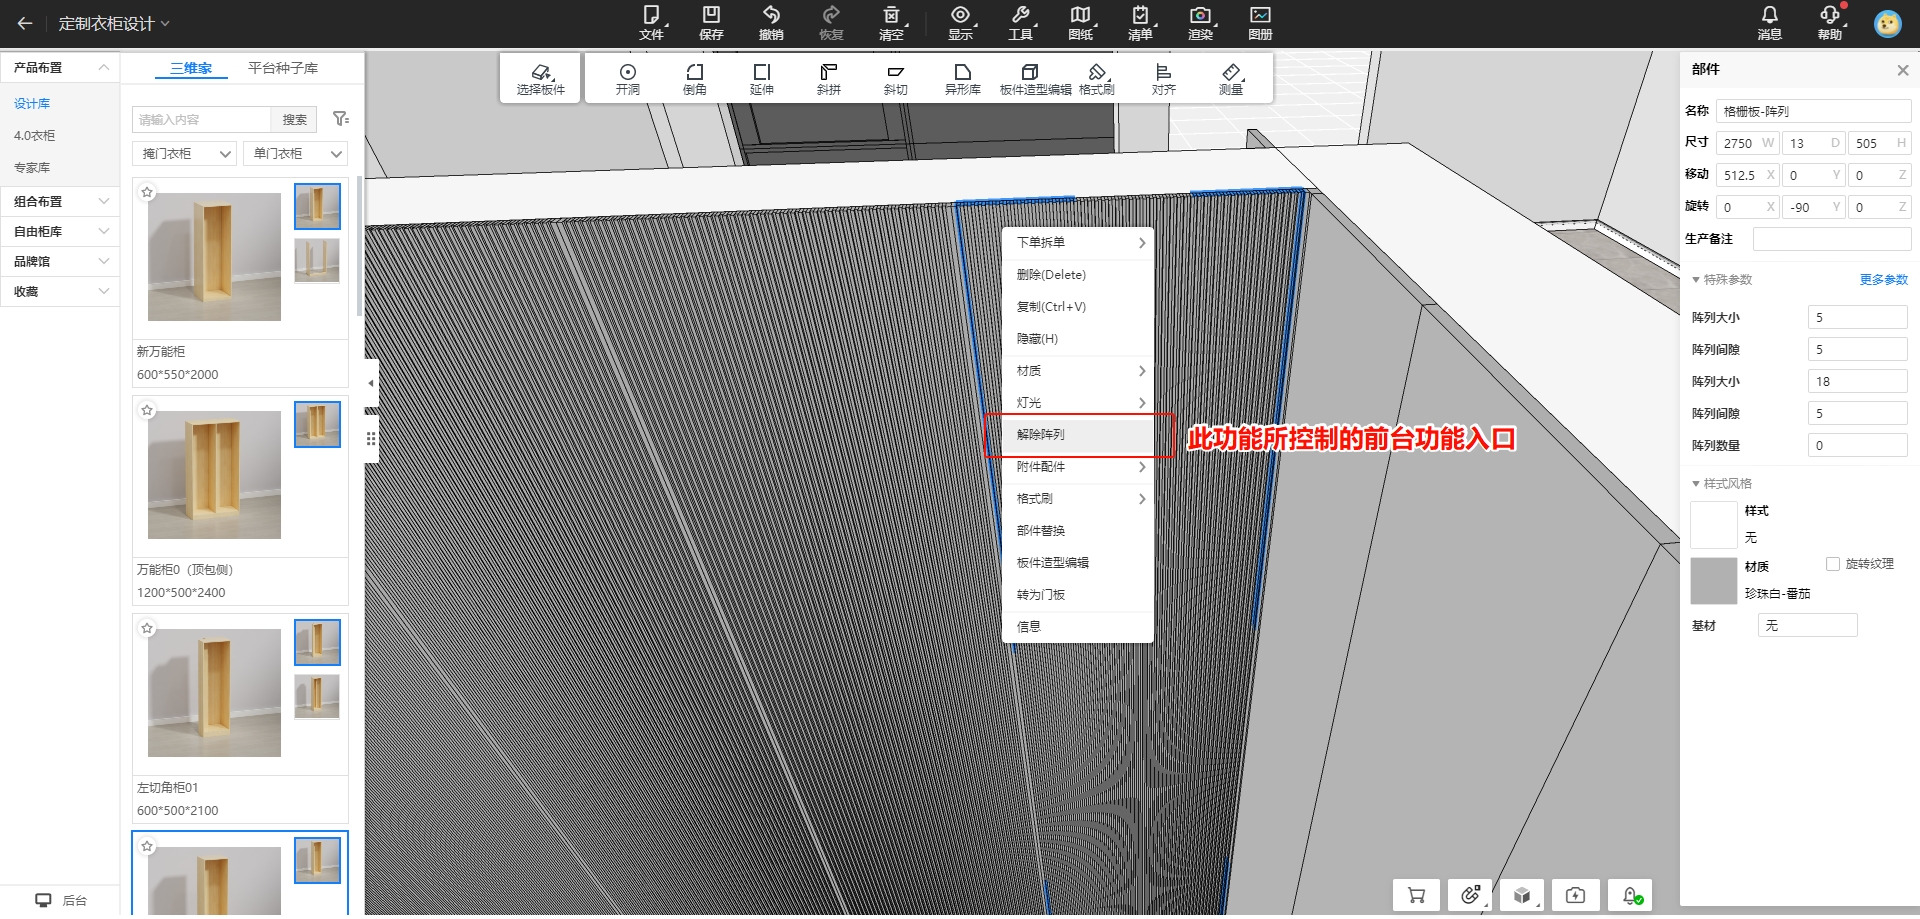
13. [Customization] "Ungroup Array" Function Entry Can Be Configured to Show or Hide (for enterprise user)
Feature Overview:
The right-click menu option "Ungroup Array" can now be configured to be shown or hidden. By default, it is visible.
Problem Solved:
Designers could convert standard array-based products into non-standard ones by using "Ungroup Array."
How to Use:
-
Open Workbench → Custom Backend Management → Advanced Custom Settings → 3D Function Settings → Right-Click Menu Configuration.
-
Select the module for which you want to enable right-click menu configuration.
-
Click "Detailed Configuration", check the box to display the function, or uncheck it to hide it in the 3D design interface.
14. [Customization] Admin Dashboard Component List Adds Open Material Function (for enterprise user)
Feature Overview:
In the 3D backend component list, you can now directly open subcomponents for editing and return to the parent component.
Problem Solved:
Previously, to open a subcomponent, users had to manually copy its ID and search for it in the library, increasing the time required for product entry.
How to Use:
-
Open the 3D Backend and load a product from the library.
-
Click the Open button in the component list to jump to the subcomponent editing interface.
-
Click "Return to Previous Component" to go back to the parent component.
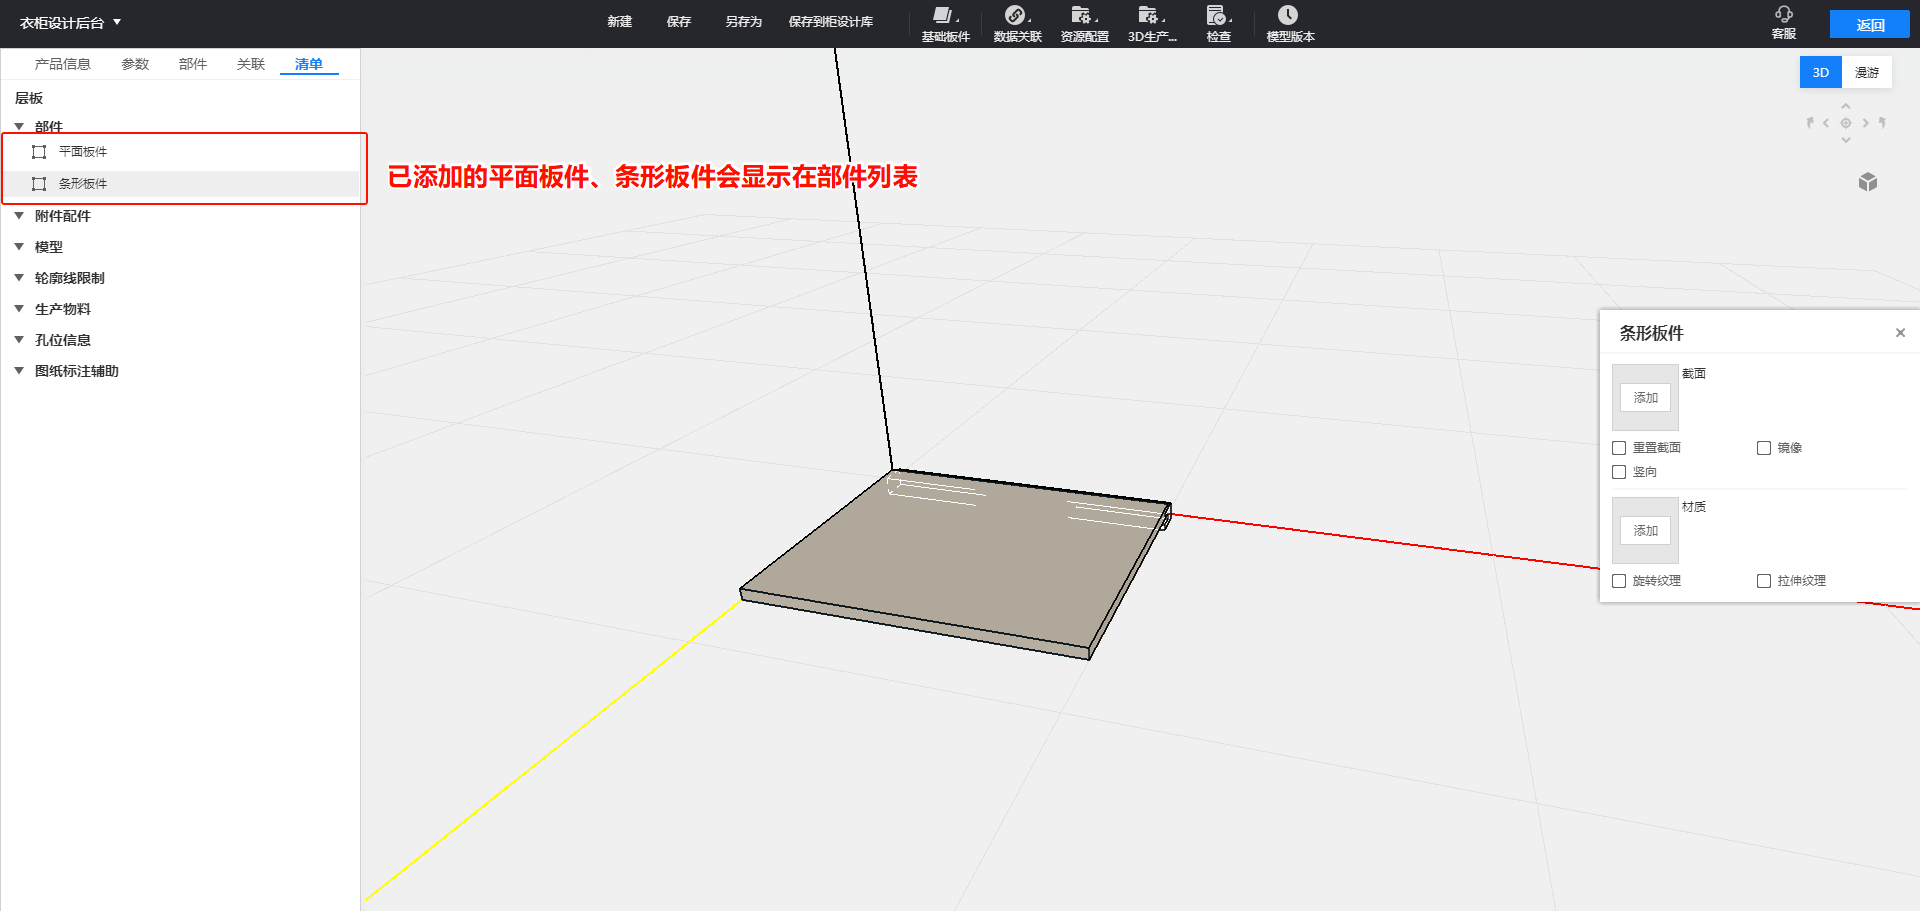
15. [Customization] Admin Dashboard List Adds Display of Flat and Bar Panels (for enterprise user)
Feature Overview:
The 3D backend component list now displays all added flat panels and strip panels.
Problem Solved:
Previously, these panels were not shown in the component list, making it difficult for users to track the number of panels added.
16. [Customization] Door Panel Preview Area Synchronizes with Base Panel Depth Position
Feature Overview:
When generating a door panel, switching the reference panel depth will also update the blue preview area to match.
Problem Solved:
Previously, the blue preview area was fixed, making it difficult to visualize the exact door placement.
How to Use:
-
Open the custom design plan.
-
Click Top Menu → Installation → Door Panel.
-
Click the arrows in the blue preview area to toggle the reference depth, and the preview will adjust accordingly.
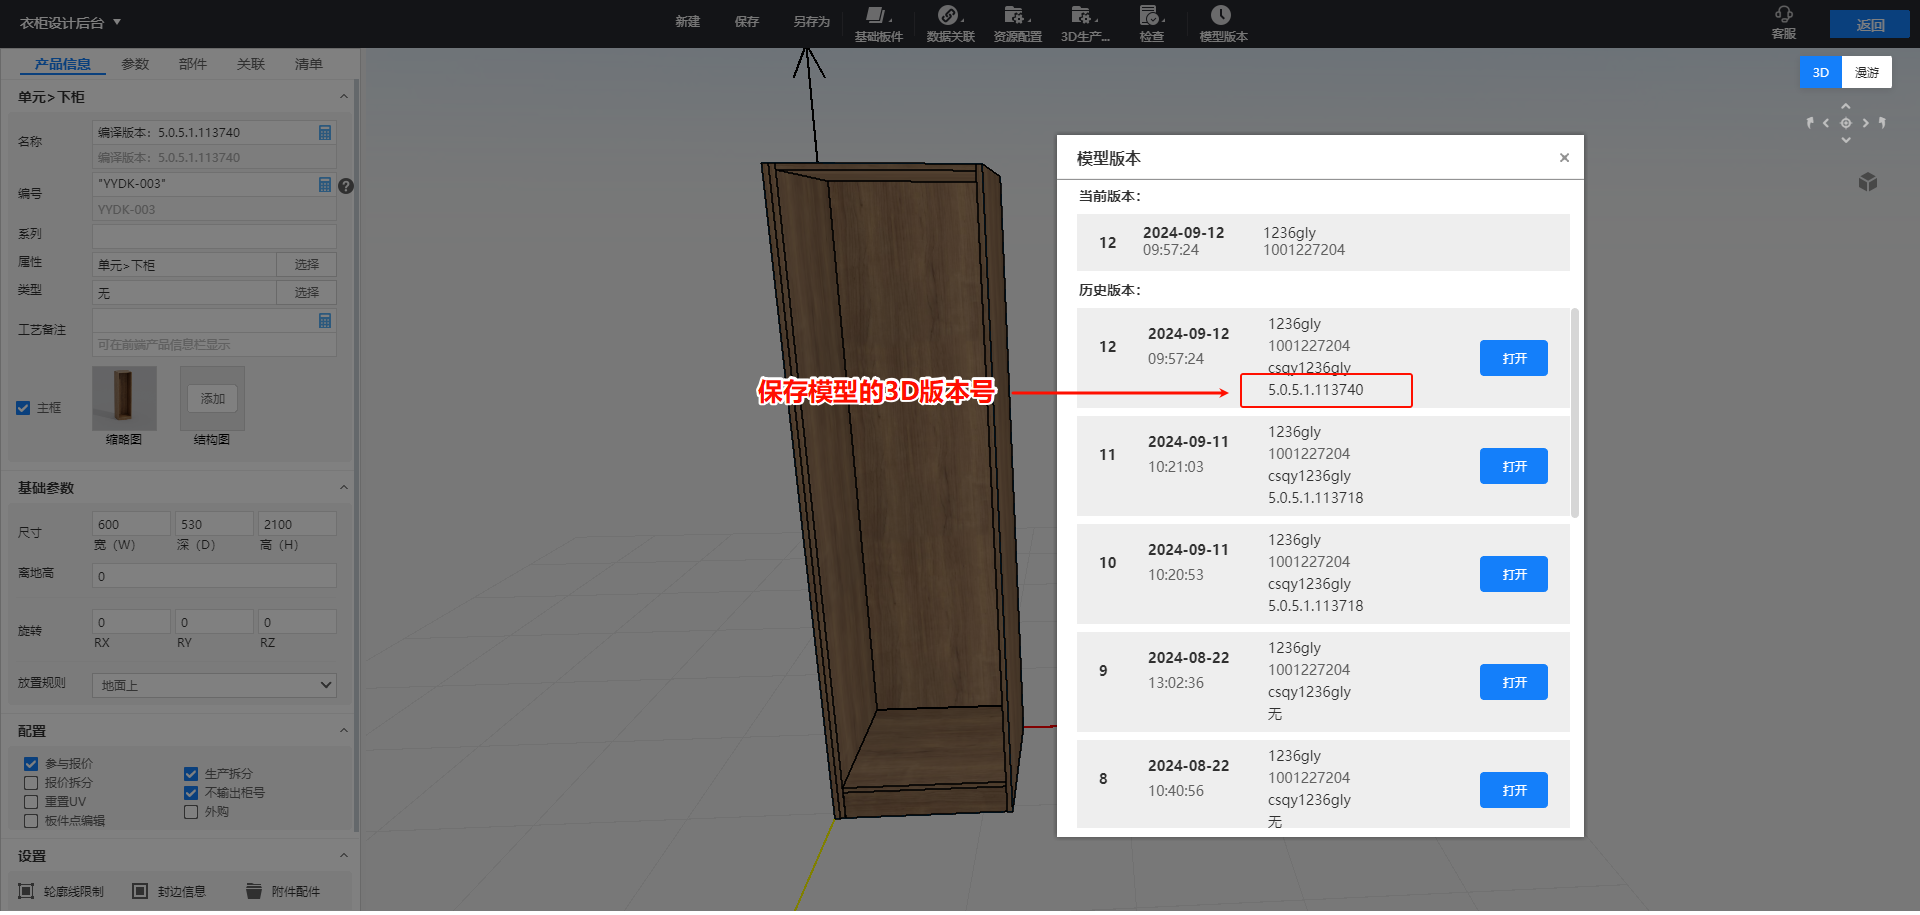
17. [Customization] Admin Dashboard Model History Adds Version Number Display (for enterprise user)
Feature Overview:
The model version list in the 3D backend now shows the 3D version number at the time of saving.
Problem Solved:
Previously, it was difficult to determine whether model issues were caused by version differences.
18. [Customization] Discontinued Cabinet Panel Selection List
Feature Overview:
-
The "Cabinet Panel Selection List" that appeared after selecting multiple panels has been removed.
-
The panel alignment function has been moved to the right-click "Align" menu.
Problem Solved:
The selection list used to block the drawing area when multiple cabinet panels were selected.
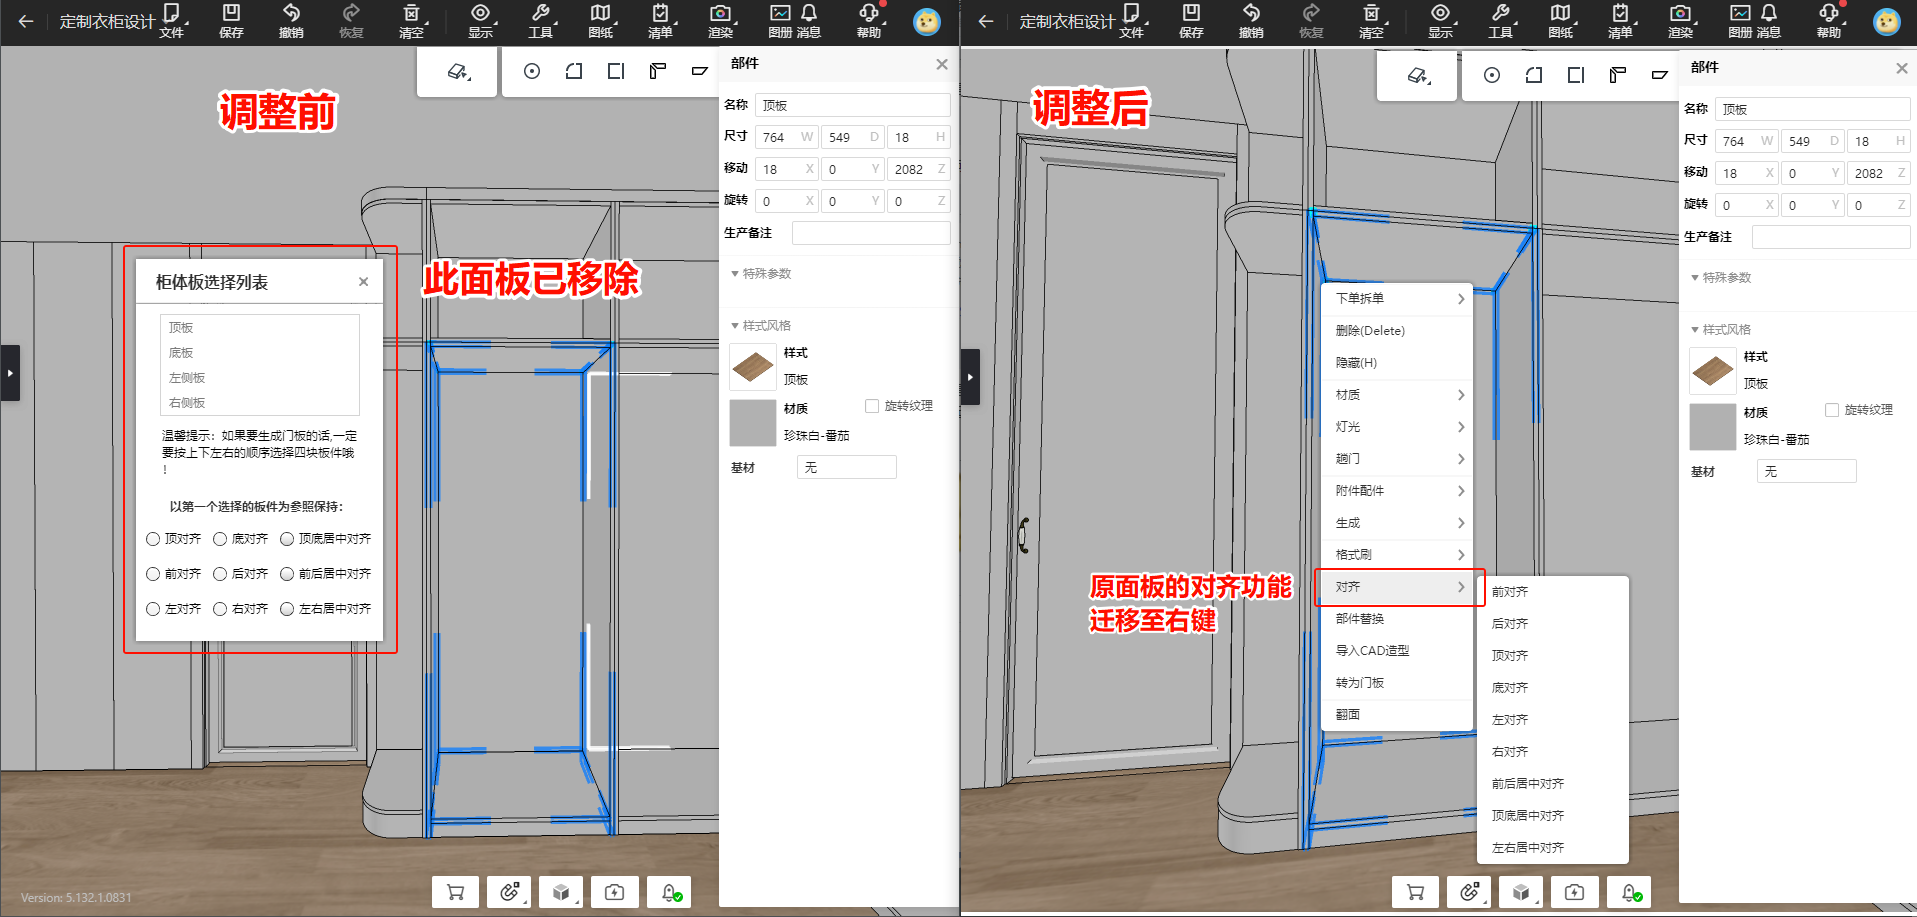
How to Use:
-
Open a custom design plan.
-
Press B to enter Panel Selection Mode, hold Ctrl to select multiple panels, then right-click to align them.
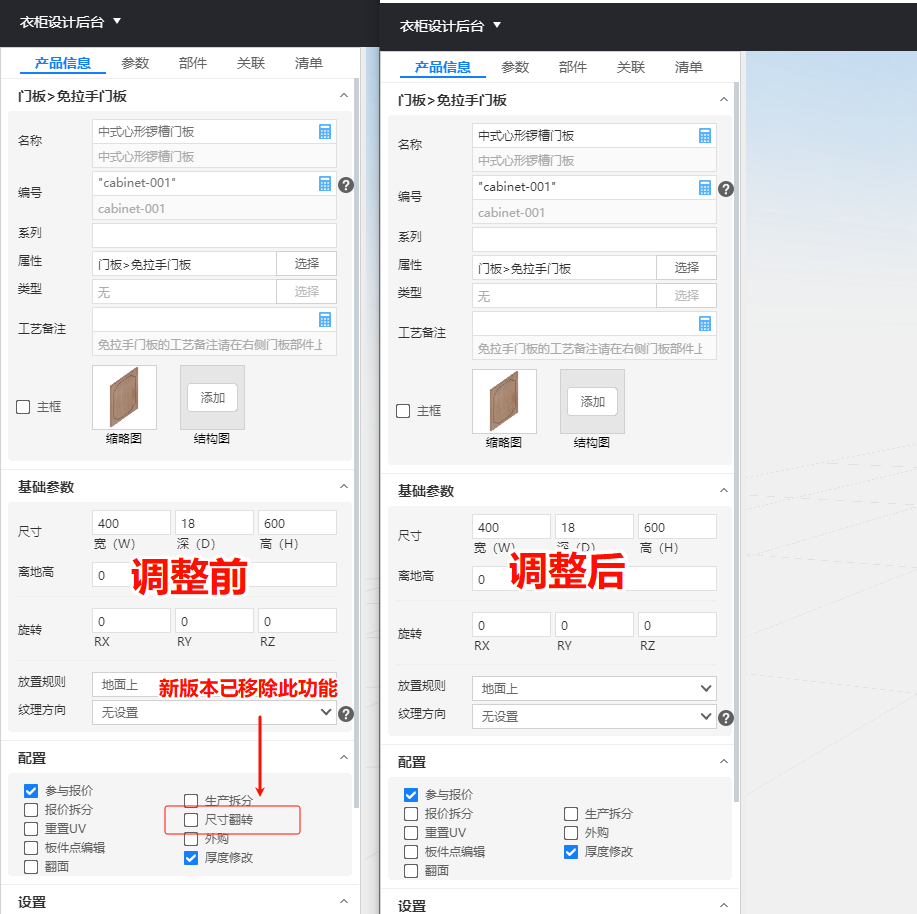
19. [Customization] Discontinued Admin Dashboard Door Panel "Size Flip" Setting (for enterprise user)
Feature Overview:
The “Dimension Flip” setting for door panel materials in the 3D backend has been removed. If door panel textures need adjustment, use the Texture Settings function instead.
Problem Solved:
This setting was replaced by the "Texture Settings" function in the platform update. Having both caused texture calculation errors.
20. [Customization] Linkage Door Hinge Installation Rule Update (Only available in AiHouse Advanced)
Feature Overview:
The installation rules for linked hinges have been optimized:
-
The two doors must open in the same direction.
-
The gap between the two doors must not exceed 5mm.
-
The height difference between the two doors must be less than 100mm.
Problem Solved:
Previously, linked hinges were sometimes misinstalled or misjudged when doors were close to each other in corner positions.